Pages

Faithful Friends

Saturday, February 28, 2015

 
For a long time I've wanted a paw print stamp.  I decided, finally, on this mini stamp set from PTI called, With Sympathy: Loss Of A Pet.  I wish it had more than just sympathy sentiments, but it's a start.  I think this sentiment, under the right circumstances, could be for something other than a sympathy card.  I used the Sunshine Layers die and a Serendipity Stamps Heart die to create a frame for my sentiment and stamping.
 
 
Here's sweet Piper taking a snooze this afternoon.  Luckily she just had a bath this morning and is all nice and clean.  {P.S. I am loving my new camera, Nikon D3100.  I was never able to get indoor photos this nice with my old camera}
 
 
Thanks for stopping by.  We are having friends over for pizza and board games.  We are going to play Life.  What's your favorite board game? Do you still play?  We do, but not as much as we used to.  It'll be fun because our friends have two young boys and I'm sure there will be a lot of laughter! 


Cardstock: Recollections White
Stamps: PTI With Sympathy: Loss Of A Pet
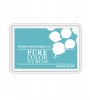
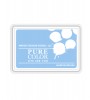
Ink: WP9 Ocean Drive, Beanstalk, Wild Mango, Versafine Onyx
Dies: WP9 Sunshine Layers, SS Heart

A Pocketful Of Sunshine

Friday, February 27, 2015

 
We made it, It's Friday!
Any good weekend plans?  We have an evening in planned for tonight.  I brought home some movies from my school library.  Sunday we are visiting my parents for dinner and a much needed haircut.  My dad is retired from cutting hair, but he was a stylist for over 40 years and he still cuts and colors my hair.  I remember when I first paid to get my hair done when I was about 28.  $200 later I called him and said, "Is that right or did I get ripped off?"  He said that was an average price.  I was used to getting it all done for free!
 
 
Anyway, I have a fun little card to share today.  I mixed A Pocketful stamp set and dies with the new Sunshine Layers dies to create a pocketful of sunshine.  A Pocketful was the set that made me first buy from WPlus9.  Even though I had loved other things that Dawn was designing, Pocketful was just such a clever, unique design and I had to have it.  All of the elements have been colored with PURE Color Dye Ink from the Storybook Collection and coated with some clear Wink Of Stella.


My little shaker is filled with multi-colored raindrops and some star glitter from Martha Stewart.
 
 
Thanks so much for coming by!
I hope you have an awesome weekend!
Don't forget to check out all the awesome new projects in the Friday Inspiration File!
 

You Are...

Wednesday, February 25, 2015


These colors are so warm and soothing.  They are helping to remind me that spring will come even though it sometimes feels like I'll never warm up.  My last card used these colors in Gelatos; this time a beautiful WPlus9 PURE Color combination.  Flamingo, Sweet Nectar, and Wild Mango work so beautifully together.


 I started by stamping the clothesline from Heartfelt Mix using Versafine Onyx ink.  I chose one banner image from Papel Picado to stamp, alternating the 3 colors.  I accented the banner with another tiny image from Papel Picado and added a sentiment from Unforgettable. I didn't want this to be a birthday card so I selectively inked the sentiment to leave off the portion that says,".....it's your birthday that's hard to remember."
 
 
 I die cut the stamped panel and a piece of black cardstock with the Sunshine Layers die.  I adhered them together, slightly off set, so that some of the black peeks out from behind for contrast, but the design stays mostly white.  A few rhinestones and a beautiful butterfly from the Small Butterfly Frame die finishes off the card.
 
 
Thanks so much for stopping by.


WPlus9 Throwback Thursday Challenge

Saturday, February 21, 2015

 
On the third Thursday of each month Maureen shares projects showcasing an older WPlus9 stamp set on the WPlus9 Design Blog, Throwback Thursday.  This month she has challenged everyone to join her and have a chance to win a $20 GC to the WPlus9 store!  I'm joining in just for fun and to encourage you to play along!  All of the details can be found {here}
 
 
Part of the challenge is to use  Maureen's projects as inspiration.  I chose to recreate her watercolor panel using gelatos.  Gelatos are a great medium, fun and versatile.  There are so many ways to use them.  I decided to lay down color from the gelato onto my craft mat and then pick it up with a wet paint brush.  I painted my color on in a gradient and set it aside to dry.  I die cut my watercolor piece with a die from Sunshine Layers and then stamped some fun clouds from an old favorite, Heartfelt Mix.  I couldn't resist adding in some of the newest stamps and dies from Unforgettable
 
 
In order to stamp my clouds on the card base in the correct spot, I used a stamp positioner.  I stamped the cloud onto the stamp positioner's clear sheet.  Placed the watercolor panel on the card base where I wanted it to be mounted later.  I placed the clear stamp positioner sheet on top of the already stamped clouds and carefully slid the watercolor piece out of the way.  This left the stamp positioner in the exact spot it needed to be for the clouds to match up when the watercolor panel was mounted.  Sounds complicated, but was really quite simple and easy to do.


Cardstock: TH Watercolor Paper, White
Stamps: WP9 Unforgettable, Heartfelt Mix
Ink: Versafine Onyx
Dies: WP9 Sunshine Layers, Unforgettable, PTI Double Ended Banner
Other: Gelatos, Rhinestones

Happily Ever After {Serendipity Stamps Guest Designer}

Wednesday, February 18, 2015

 
 I'm back again with a special post for  the Serendipity Stamps Challenge BlogThis month's theme is All You Need Is Love.  Today I have two cards to share made from one stamped piece.  I started by stamping the Marble Waves Background onto watercolor paper. I stamped this image using Versamark ink and embossed it with white embossing powder. 
 
 
Using a wet paint brush, I took pigment directly from my Inktense pencil and applied it to the paper over my embossed design.  I allowed the color to dry and then added more color to some areas using the same technique.  Once the piece was dry, I die cut a large Solid Heart.  This die does have little registration holes for lining it up with it's coordinating stamp, but I cut those off with my wire cutters. 

 
 I backed the heart opening with two pieces of vellum.  In between those two pieces of vellum I sandwiched some heart confetti.  Because the vellum is only adhered around the edges and the confetti is small, the little iridescent hearts do move around when you shake them even though the two pieces of vellum are adhered with out any foam tape.  My little shaker was adhered to my card front layered on top of cardstock and vellum panels that had been die cut with stitched rectangle dies.
 
 
 My second card uses the heart that was left over from the first card.  I adhered it to the center of the card and embellished it with the SS Love die cut and it's hearts. 
 
 
The inside is lined with white cardstock and the Be My Valentine sentiment is stamped in Versafine Onyx ink.

 
Thanks so much for stopping by!  Don't forget to stop by and visit the SS Design Team for more inspiration.


Cardstock: WP9 Sweet Gelato, PTI Vellum,, Recollections White, TH Watercolor Paper
Stamps: Serendipity Stamps Be My Valentine, SSS All Occasion Banners 
Ink: Versafine Onyx, Versamark
Dies: SS Love, Large Solid Heart, SSS Stitched Rectangle Dies, SSS Tilted Banner Die
Other: White Embossing Powder, Derwent Inktense Pencils, Martha Stewart Heart Glitter

Miss You

Tuesday, February 17, 2015

 
Hello! Just popping in with a simple little card.  Awhile ago I made {THIS} card and I saved the little die cut heart. The pattern on the heart was stamped in Versafine Onyx ink and clear heat embossed.
 
 
 Each section was colored with a Copic Marker.  I popped the heart up on a white and red panel that were both cut with stitched frame dies.  Super simple.
  
 
Thanks so much for stopping by.  Today was a snow day so I've been working on a few fun things and some housework.
What are you up to?


Cardstock: PTI Pure Poppy, Recollections White
Stamps: Serendipity Stamps Wood Background, Miss You Small
Ink: Versafine Onyx
Dies: Serendipity Stamps Mini Scallop Heart, SSS Stitched Rectangle Dies
Other: Clear Embossing Powder, Copic Markers

Stenciling With Distress Stickles

Monday, February 16, 2015

 
Hi...still cold! lol 
We are expecting 6-12 more inches of snow overnight tonight. We ventured out to the grocery store today and that was plenty.  Ryan is outside cutting up some more wood for the stove.  I've been enjoying some time in my craft room.
 
  This week's PTI Make it Monday is all about stenciling and creating your own stencils using cover plate dies.  I thought I might use glossy accents again since I loved the look when I discovered how well it worked last year.
 
 
 However, I thought my stickles might work just as well. 
 
 
I created my stencil with the hexagon cover plate die.  I squirted some Picket Fence Distress Stickles onto my craft mat.  With a little spatula I scraped up some of the stickles and spread it out evenly over the stencil.  I removed the stencil and set the piece aside to dry.   I love the effect! 
 

I decided to embellish the corner with layers and layers of butterflies.  The bottom two are die cut from Kraft and Vellum and then embossed with the same cover plate.  On top of that are two wood veneer butterflies and finally topped with a butterfly button!
 
Thanks so much for stopping by!


Cardstock: PTI Kraft, Vellum, Recollections White
Stamps: PTI Over Under Easy
Ink: Versafine Onyx
Dies: PTI Hexagon Cover Plate, Beautiful Butterflies, SSS Stitched Rectangles, Tilted Banner
Other: Ranger Distress Stickles, Studio Calico Wood Veneer Butterflies and Button, PTI White Cotton Twine

A Little Sunshine

Sunday, February 15, 2015

 
Hello!
I'm in need of a little sunshine.  How about you?  We got more snow overnight and it has been so windy!  I decided to have a little fun with the cloud dies from the Sunshine Layers Die Collection.  All of the pieces are inlaid together to create a flat designs.  I added a little Wink Of Stella to the word 'sunshine' and popped up a cute little bow from Unforgettable.  The bow and the outlines of the clouds have been colored with the new PURE Color Dye Inks that were released this month.  They provide such solid, even coverage.  You wouldn't know it wasn't colored cardstock.

 
Have a great day!


Cardstock: WP9 Black, Recollections White, PTI Lavender Moon
Stamps: WP9 Sending Sunshine
Ink: WP9 Little Piggy, Bo Peep, Cockleshell, Falling Stars, Versafine Onyx
Dies: WP9 Sunshine Layers, Unforgettable
Other: Wink Of Stella

Our Hero

Saturday, February 14, 2015

 
Happy Valentine's Day!
I'm home doing my own thing {card making when I should be cleaning} and Ryan is at his dad's doing his.  Later we will meet back up and have a nice dinner in and a movie.  What are your plans?  So far today I made this card for my nephew.  He will be 19 this month and is in the Army.  I decided to create ombre' stripes using a stencil and dye ink.  Using a sponge dauber, I added the color from my ink pads onto the stripes of the stencil.  Originally I made this pink elephant card for the ombre' challenge.  When I went to link it up I thought, "Why are all of these entries blue?!"  DUH!  I guess I should read more carefully next time :)
 
 
Afterwards, I die cut the word HERO using the PTI Headline Alphabet dies. I stamped my sentiments in black and popped the panel up on top of WP9 black cardstock.  I decided to add a few die cut stars and cover them in a little Wink Of Stella. Simple design, but has a lot of impact I think. 
 
 
Thanks for stopping by! Hope you are surrounded by love today and everyday!


Cardstock: WP9 Black, Recollections White
Stamps: PTI Military Hero
Ink: PTI Enchanted Evening, Blueberry Sky, Spring Rain, Versafine Onyx
Dies: PTI Headline Alphabet, SSS Stitched Rectangles, SSS Holiday Shapes Stars
Other: Heidi Swapp Stencil, Clear Wink Of Stella Brush Pen
Proudly designed by | mlekoshi playground |